Wednesday, August 8, 2018

Adorn Cakes by Aleta

I have had the opportunity, recently, to work for Aleta Schnitzer at Adorn Cakes by Aleta.  I have known Aleta for years, so when she needed help in her shop, I jumped at the chance to work with and learn from her!
All of the cakes were collaborative, but occasionally, she let me work on my own for part or all of the project.  The designs were all hers, or from inspiration pictures.
I had used Italian meringue butter cream in the past, but Aleta uses it exclusively, and she converted me quickly.  All of these cakes are made using IMBC.
This post shows some of the cakes I worked on and learned from with Aleta.


Everly


I believe this cake was for a first birthday.  It was my first attempt at modeling an object, the lamb.  I worked on it entirely on my own, with Aleta's coaching and ideas.  The lamb is made entirely of modeling chocolate, with each puff of "wool" hand rolled and attached by royal icing.
This cake was picked up by the customer, so we removed the lamb, and put her in a separate box for transport.  Apparently, when they got it home, they set the lamb on a table or counter, and the dog got to her. :(  Aleta scrambled, and made another one last minute.
I assembled the cake, and added the rosettes, and Aleta piped the flowers around the name.


Smash Cake

This picture is from the photographer's Instagram feed.  I LOVE how a good photographer can really make a cake look good!
This was my first ombre effect cake.  We wanted to keep that striped look, rather than blending, however, and it worked really well!  I also made the "1" out of modeling chocolate.


Race Car


This was such a fun cake!  Obviously, it was for a 2nd birthday.  I did all of the modeling of the cones and race car out of modeling chocolate, and all of the other decorations are modeling chocolate as well.  Bottom tier "tire" is modeling chocolate, and I helped make the pattern on the side, but Aleta did most of the work on that tier, as we were kind of making it up as we went.
The cake board is covered with fondant that we rolled a galvanized pattern into, and painted silver with a mixture of luster dust and confectioner's glaze. 


Rosette Wedding
This cake marked my first attempt at edible lace, and I have to say, it was easier than I expected, but also not as hard as I was bracing myself for.  The "lace"material was spread into the mold, and then baked on a very low temperature until set; maybe 20 mins or so.  I then painted it with the same luster dust mixture as on the race car cake board.
I love the texture of the rosettes!  I think it creates some movement that really enhances the overall feel of the cake.  It's hard to see in this picture, but there is a pearl border along the bottom of the top tier.  It was made out of modeling chocolate in a silicone mold, and given a pearl sheen.  This was one of the first cakes Aleta let me go it alone on.  


It's a Boy!


This cake idea came from an inspiration picture submitted to Aleta by the customer.  It was for the baby shower of one of her former bridal clients.  
Aleta gave me the lead on this cake, and I did it myself!  The white areas are the IMBC showing, everything else is covered in or made of modeling chocolate.  
I think it was so sweet and so fun!


Modern Wedding
I can't take much credit for this cake, but I did contribute to it.  
I built the pyramids out of gum paste.  It took several versions before we got some that looked the way Aleta wanted.  Sometimes, the fun of decorating comes from trial and error; just playing around until you get it right!
I also frosted the top tier in ombre.  I believe the rest of the cake was done by Aleta, and possibly Kaitlin, another fabulous assistant.


Indian Wedding
This cake seemed a little weird to me when Aleta first showed me the sketch; but it grew on me as I went along, and I was really happy with the result!  This is another one where she let me go on my own.
The bride was from India, and was doing a traditional Indian wedding, with an art deco flair.  Very beautiful!
I extruded all of the swags from gum paste, then shaped them and put them in the freezer for a bit, so they would hold their shape, then placed them on the cake.  It was trickier than it seems, but the result was wonderful.


Gold Drizzles

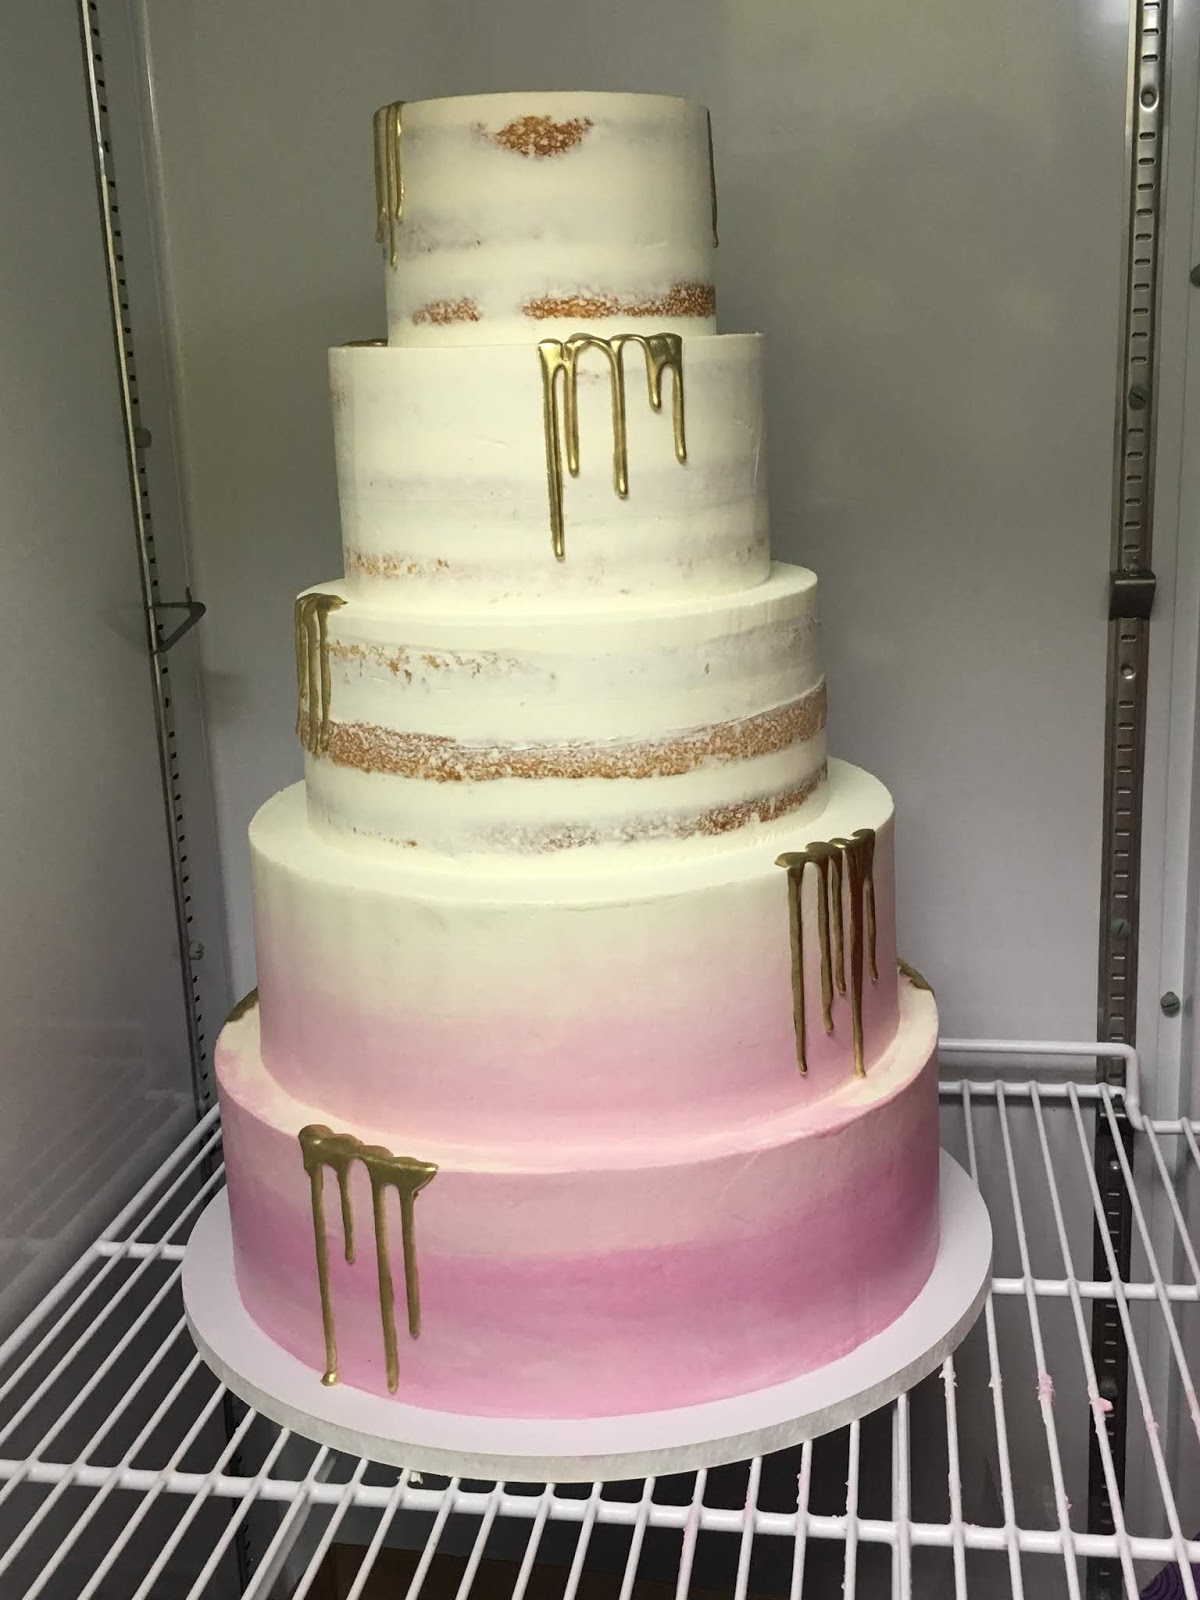
Here's proof that a good photographer makes all the difference!  The top picture was taken with my phone, while the cake was still in the fridge, awaiting delivery.  The second picture is the completed cake at the venue, taken by the wedding photographer.
I had never done drizzles before this cake, and they were as easy as they look!  The really fun part, however, was painting them gold, for a really fancy look.  
I also learned to do semi-naked cakes with Aleta. The semi naked look is growing on me, but I prefer when the bottom tier or two are completely frosted, so that the cake doesn't have too rustic of a look.


ONE
I wish I had a better picture of this cake, because it turned out so cute!  It is another cake from an inspiration picture.  I frosted the cake, and extruded the string, and applied it to the cake; however, I had help on this one from Kaitlin, and Connie to get the polka dots applied, and the balloon done quickly.


Woodland Fun

For this cake, I was only involved in making the teepee and woodland creatures.  I also did not paint the teepee, just assembled it.  The teepee is gum paste, and the woodland creatures are modeling chocolate.  I printed the pictures on the computer, and used that as a template to cut the features in the faces and bodies.
The birch look on the sides of the cake, and assembly was done by someone else.


Hammered Copper

When we were working on this one, I didn't have a complete idea in my head of Aleta's vision, so I just did each element as I was told, but the finished product is one of my favorites!
I made one of the "hammered copper" inserts, cut out, shaped, and applied most of the leaves, with help. (It's a big task, even if it's not so difficult)
I also helped marble the modeling chocolate around the middle tier, but I don't think I was the one to apply it.


New Techniques

I am lumping these two cakes together, because they show two new finishing techniques I learned with Aleta.  
The top cake, we call the "Dolce swirl."  It is very simple, but takes a little feel to get it to look even. 
The bottom cake is literally spackled with butter cream.  The IMBC makes this so easy, because you frost and set up the cake in the fridge, and then you have a hard surface to spackle on.


I enjoyed so much working for Aleta.  I learned as much in that time as I had previously learned in my life!
During my time there, I also used an airbrush for the first time, and tried many other things for the first time.
It's all about learning and growing, and I am looking forward to opportunities to continue practicing these techniques!


Saturday, February 25, 2017

Lindsay and John

Wow, I am actually sitting down to post about a cake right after delivering it!

So many of my brides are girls I have known since childhood, and Lindsay is no exception.  I taught her in our church primary, when she was probably 11 years old.  

Lindsay wanted a small cake to freeze for their first anniversary, and then 125 cupcakes for the guests.  Her colors were Burgundy and navy.  

Sounds about right!

Because I have had trouble with cupcake liners pulling away, or puckering, or both, in the past, and because I needed a specific color, I ordered them from a shop on Etsy, called TheSparklingPantry.  I was thrilled when they came!  They were just the right color, they were thick, and substantial, and best of all, they fit perfectly in my cupcake tins!  However, after baking, they pulled away from about 1/2 of the cupcakes.  I know it is not the liners, because of my past experience, but I need to do more research on why that keeps happening.  I suspect it is the oil ratio, which would be a bummer, because that is what makes the cupcakes so moist.

In a panic, I ran to my local cake supply store, The Baker's Rack, and explained my problem.  I consider it no small miracle that she happened to have just the right solution; cupcake wrappers in navy blue! (Wrappers are like a small cup to set the cupcake inside of for decoration.)  She said she has had them for years, but they just don't sell, and all she had left was 10 packages (120 wrappers!)  My husband was thrilled when I told him I needed him to come on the delivery, and assemble 120 wrappers, (not!) but he was a trooper, and saved my day!

It only took us about 1/2 hour to set them all up, and they looked really good; in fact, I think they look much better sitting in the wrappers.  

Before the flowers were added

Of course, most of my cakes would not be complete without the lovely and talented Casey Benedict!  Her flowers just make all the difference!

After Casey worked her magic!

For this cake, I again used my Marvelous Molds silicone mold, in the damask pattern to decorate the sides.  I set the 6" cake on the tower, and then added the border.  

Thursday, February 9, 2017

Ashlynn and Harry

I was excited about this cake, because I have never used one of the "combs" to make texture on the side of the cake!


For this, I used the same cream cheese frosting from the cake for Connor and Sara.  The first pattern I used didn't work; some of the ridges in the frosting did not fill in, and I'm not sure why.  I will have to continue to play with it and see.  I decided to try a "comb" with a more shallow pattern, and it worked perfectly!  

Because I was trying something new, I started a few days earlier than maybe I usually would, and that turned out to be a blessing in disguise; I came down with a massive head cold the day before the wedding, but all I had left to do was stack the cake and add the border.  I delivered the cake, but unfortunately, was not able to stay for the reception.  Hopefully, it was what they wanted.

I have GOT to learn how to use my iPhone camera better; with the window behind, I couldn't get a well-lit picture of the whole display from the front.

The florist called me the night before, and said that she had left a topper, and some extra flowers for me to add to the cake.  This always makes me a little nervous, because my floral skills are not the best, but I am learning!  Her topper was beautiful, and I just had to set it on top.  I clipped a few more flowers, and paired them with some filler or leaves, and scattered them around the cake.  I think I did pretty well!  I have learned a trick or two from watching Casey Benedict!

The final cake up close.  You can't really see the pattern on the side in this one, but I wanted to show the cake from several sides.

I love how this one turned out.  You can really see the pattern, and it looks so smooth!

Monday, January 9, 2017

Connor and Sara

A while back, my daughter determined to fix her roommate up with one of her best friends she's known since high school.  Apparently, she has good intuition, because it worked out perfectly! Connor and Sara Weeks (#twoweeks cute, huh?) were married on Dec. 27th, and Courtney served as one of the bridesmaids.  They had a Kansas open house here this past weekend.

Connor's mom gave me a picture of what they wanted.  it is kind of a "modern, rustic" look.  They wanted red velvet cake with cream cheese frosting.  I added a faux vanilla mousse filling, just to lighten up the flavor a little.  

Here's the bare cake, just after assembly.

I usually work with a crusting frosting, and I have a recipe for a crusting cream cheese frosting, but a crusting frosting would not work with this technique on the sides.  Thank goodness for Cake Central!  Regular cream cheese frostings are too runny to frost and smooth a cake with, but this recipe has a secret ingredient that makes it light and fluffy, and a dream to work with: Cool Whip!  Oh my goodness was it good!  I gave away one business card, and Amy, Connor's mom, gave my name to several others.  

The finished product--lovely!

I have mentioned Casey Benedict before.  She is a friend from way back, and a spectacular florist.  She makes my cakes look so good!  I love to stay and watch her work her magic, after I have set up the cake.  She just talks and arranges the flowers like it's second nature to her. Im sure it is.  The hydrangeas make this look so full and finished, and the orange accents are a perfect balance.

A better view of Casey's work

The full display

Everything went so smoothly with this cake, and I was feeling so good about it, that I went home to change for the reception, and left the gift for the bride and groom on my kitchen counter! ;P
(Thank goodness for the USPS)

Congratulations, Mr. and Mrs. Weeks!

Friday, December 30, 2016

AhMu Open House

One year ago, give or take a week, I did the wedding cake for one of Courtney's best mission friends. Alex and Cole This fall, I got a call from the Alex's uncle.  He said that he and his wife had "been to a lot of weddings, and had a lot of bad wedding cake, but they really liked Alex's cake."  That made my day!  

Their son got married at Thanksgiving time, in Florida, but they wanted to have an open house for the bride and groom here, in Kansas City, and wanted a cake.  They were very concerned that the cake be simple, and not outdo the cake that the couple had for their wedding day.  They just wanted a plain cake with a ribbon border, like Alex's, but they had a topper that they would put on top. That meant I needed to make a supported cardboard platform for the topper to sit on. 

The wedding colors were light pink and navy, so they wanted the ribbon to be light pink, but trusted me to find something that would work.
When looking at ribbon, I saw some very delicate, light pink ribbon, but it seemed that they would not stand out against the white cake, so I went with a slightly darker rose pink, in a sheer, with a narrower satin ribbon to accent it.

Back of the cake, where the ribbon attaches with white pins.

When I went to deliver the cake, the father of the groom, who ordered the cake, said, "This is exactly what we wanted!"  How's that to make your day??!
I don't always get to talk to the customers when I drop off the cake, so I was very delighted to hear that feedback!

The finished cake, all delivered.  The pink in this picture is a little more accurate than the one above, and you can see that it matches the pink runner it is sitting on.
The topper says "For Time and all Eternity"

I forgot to snap a picture when I dropped off the cake, but I noticed that the dad was snapping a few on his phone, so I texted him later and asked if I could get a copy.  He immediately texted me back with the above picture, and said that they had loved the cake, and it tasted great!

Saturday, October 15, 2016

Bella's Birthdays

Since I am so bad at updating this blog, several years actually elapsed between posts, so this post covers two birthdays of the same girl, two years apart.  The Little Mermaid cake was her 4th birthday, and the Pokemon was her 6th.

She is growing up so fast!

I love when I get to try a new technique, and I had been wanting to try these "scales."  They were every bit as easy as they look!  I would love to try the same technique in different designs.  

The cake as it looked when they picked it up.

The mother had a figurine for on top of the cake, so I left that empty.  I also tried the shells of the "bra" both directions, and this way they actually fit on the cake better.

Which is the cake, and which is the birthday girl? Lol


By her 6th birthday, she had moved on to Pokemon.  The party was so cute, all of the grown ups in her family had "Pokemon Trainer" t-shirts, and, of course, there was a bounce house!

This one was fairly simple, but making Pikachu's face look right proved to be a little difficult.  I played with it on the mat, and made changes before I put it on the cake, and I still think it turned out slightly out of proportion.  Oh well, the birthday girl was thrilled, and that's all that matters. (I also thought the bottom tier "Pokeball" looked a little like Santa Claus, but once I put the top on, it tied the tiers together!)

"Artistic view"  Lol!  I tilted my phone, so that I could get closer, and still get the whole cake in the picture.

The whole spread.  As you can see behind the table, Bella is well loved!

Saturday, September 17, 2016

Lindsay Loo!

I have made cakes for everyone in the Albrechtsen family, some I've even made two for, except Lindsay!  Well, I had to rectify the situation in a big way, so I made something FABULOUS!

The feathers were from Marissa's 18th birthday cake. (Her older sister)

I had been wanting to try this ruffle/tutu technique, and Lindsay is a dancer, so who better?

The ruffles are made with TONS of circles, ruffled around the edges, and folded in to a "clump" kind of like a carnation.  Then, they are stuck to the side of the cake with gum glue, and crammed in to make the ruffles look full, and keep them from drooping.  It is a tedious task, but very simple.

The top tier is a damask done with the Marvelous Molds silicone mats.

I think the result was worth it, and I think Lindsay did, too!